Tuesday, May 20, 2014

Game Piece

My colleague, Ms. Luna, has assigned her AP Calculus students a year-end project. They are, in groups, to create a game, based on some board game they already know, but with a Calculus theme. I enter the picture because these students imagine that they can come to me and simply say "print me something like a game piece," and I'll immediately be able to fire up my 3D printer and print out exactly the piece they are imagining. When I try to get them involved in actually designing whatever it is they want, they usually turn and walk away.

This morning I had a student, N, who was willing to work on design. (right there, it makes me happy) So we sat together and I tried to get N to give me her specifications. I tried, bit by bit, to nudge her towards speaking in terms of geometric solids.

I eventually got N to describe the game piece as a cube with a sphere sitting on top. We drafted the idea of the cube as the intersection of inequalities in the x, y, and z directions. Equation of a sphere is standard, and wasn't a problem once we decided radius and how much it should overlap the cube. From there I was able to work on designing in Mathematica.  We wound up with
RegionPlot3D[Abs[x]  < 1/2 && Abs[y] < 1/2 && Abs[z] < 1/2 || Sqrt[x^2 + y^2 + (z - 5/8)^2] < (5/8)^2, {x, -1, 1}, {y, -1, 1}, {z, -1, 2}, PlotPoints -> 50, BoxRatios -> Automatic]


I exported the plot to .stl, and opened the file in MakerWare. As usual, MakerWare wanted me to scale the drawing. She wanted two game pieces, so I copied the scaled piece a little to the right. Lately I've been printing almost everything with a raft, so I selected the raft option, reduced the solid fill to 7% (default was 10%), and clicked print.


Printing went fine. I was about to break off the raft when N stopped me. "No! I like that!" Okay by me.

Wednesday, April 16, 2014

Lissajous

Finally, I've got some moderate success to report with my Lissajous figure.

Yesterday I tried printing with raft and supports (because of printing difficulties without).


somehow reminds me of the World Series trophy
So the figure printed, although it took a long time (a little over two hours) because extruding all the extra plastic for the supports was a significant addition. Then, afterwards, the supports needed to be broken out.
removing supports with my handy dandy leatherman tool
And that's where the issues arose. Even though I repaired the .stl file with visCAM and netfabb, the intersections points were still weak, and I could see light coming through them. They didn't appear to be solid connections. The physical stress of breaking off the supports was more than the structure could deal with, and it began to break. "Don't worry," people told me, "you can superglue it back together." But that's not the point. I wanted to print as a single piece.
printed with supports, mostly removed, but lost integrity of the plot in the process
I thought of taking the piece home and use my Dremel rotary tool to get the rest of the supports off. But I left school in a hurry, and neglected to pack it.

While doing whatever it is I do when not at work, an idea came to me -- rotate the figure 90 degrees in the y-z plane. The problem had been my horizontal spans had been too long, but by rotating I'd change those horizontals to verticals. Verticals don't typically have as much issue printing.

So that's what I tried this morning. Using the exact same .stl file, I used MakerWare to rotate, and printed with rafts but without supports. Success!
small raft under each loop

printing complete. I like the wisp of PLA trailing back to the print head.
before removing the rafts
after removing the rafts. hand modeling courtesy of Eloise.
If anyone wants, here's the .thing on thingiverse.

*** change history ***
4/19/2014 added link to .thing file
4/16/2014 corrected spelling

Saturday, April 12, 2014

Fixing 3D Designs

One of the things George warned us about is the possiblity that Mathematica might create an invalid .stl file when it exports. I don't understand the bug exactly, but somehow when it draws the .stl, which is composed of many triangles which have orientation, it might create some triangles either with orientation reversed, or with edges that don't align correctly. He suggested two tools to detect and fix these errors.

Since I had a problem printing my lissajous figure (see image below), I thought it might be from this sort of error. I downloaded and installed the first tool, VisCam, and it indeed found 24 flipped triangles. But this tool cannot fix. It can only check for errors. So I downloaded and installed the second tool, NetFabb. It took a while for me to figure this one out, but eventually I found the menu to check, and the menu to repair errors. But it wants to save only in its own format, and it took me a while to discover how to export back to .stl. Turns out the part has to be selected for this option to appear. Okay, obvious, but it took me a while.

Next week I'll try printing the repaired part, and I'll report back on how it goes.

Sunday, April 6, 2014

Infinite Series

Sometimes the amazed reaction of a student becomes the high point of a day or week.

Discussing series in Calculus class, and one student brings up the example of how
They've obviously heard this one before, but one student up front mutters, "They say that, but I don't see how it's possible." I think I first saw this proof back in 8th grade, from my then teacher Eugene Thompson. I think the idea of converting repeating decimals to fractions was part of the curriculum, and I never checked if that's still something in the middle school standards.

But I offered, "I can prove it pretty quickly to you, if you like." Over half the class nodded and vocalized assent. Perhaps nobody has every bothered to show them this. So I began (most of my math friends know these steps, so bear with me).
I checked, and everyone was okay with this step. So I continued.
Again, I checked. Everybody was okay this this step. So I said I would subtract the first from the second
A third time, I paused and confirm everybody was okay with my steps. No funny business.

This is the result of the subtraction. Still very straightforward. Of course, next I divide both sides by 9.
"Whoa! Wait a second! How did that happen?" A student in back who wasn't paying attention asked me to do it again. Another student asked if it always works (by which I think she meant does that work for all repeating decimals). So I showed them again with 0.6666 repeating. I had them amazed and enthralled.

It was a ten minute diversion in a 98 minute class. I think it was worth it.

Friday, April 4, 2014

Checksums for Groupwork

I was trying to refresh my memory of what Jill Gough has showed me about leveled assessments, and so I was searching her blog Experiments in Learning by Doing. In that process, I came across a link she had to this post from Function of Time, blogged by Kate Nowak. I was intrigued by the idea, and decided to try to adapt it to my classroom.

I teach three sections of Geometry this year, one freshmen and two sophomore. I chose to write an activity for Distance Formula using this self-check routine. With the help of my awesome student teacher, this year I've managed to make meaningful groupwork the norm in my classroom. So the students are used to a lot of the typical classroom rules of groupwork (ask each other before asking teacher, work with your own group rather than others, etc). I wouldn't recommend trying this on the first day of groups.

We've spent a few days applying Pythagorean theorem to triangle problems. The next task in our pacing calendar is to draw the tie to distance formula. I introduced the idea with a brief explanation showing we can calculate distance between points not on the same vertical or horizontal line by making those points endpoints of a segment corresponding to the hypotenuse of a right triangle whose legs are horizontal and vertical. I try to emphasize that the distance formula, littered with subscripts and pesky subtractions and additions and exponents and radicals, is really just the Pythagorean theorem, which my students all knew before they ever met me.

So, we worked a few problems together. Then I let them loose with their worksheets.

As Ms. Nowak describes, I had groupings of four students, four worksheets of graduated difficulty on differently colored paper, the colors posted in order on the board, with the checksum folded inside.

I gave the verbal instructions, as this task is a little different than other group tasks we've done. Each student is to do one problem per sheet. I asked them to write their name next to the problem they worked. When all four problems are finished, add the numerical answers and check it against the checksum on the whiteboard. My classroom calculators were made available to students who don't carry their own.


The orange and blue sheets had straightforward distance problems; orange with integers and blue with radicals. The green sheet gave distances and three of four coordinates, asking for the missing coordinate. The yellow sheet gave vertices of polygons and asked things about the underlying polygons.

Things didn't go so well for the first class. I noticed almost all groups started with the yellow (most difficult) sheet, and didn't make any progress. My suggestion they start with the orange (easier) met few results. When the period bell rang, no group had completed any entire single sheet.

For the second class, I began by only distributing the orange and blue sheets. As groups made progress, I gave them the green, and then the yellow. The second class is my freshmen (ninth grade) who typically have difficulty focusing on work. Even so, they made much better progress than the first group. I used the same distribution pattern for the third class, and they did the most work of all. Almost all the groups at least began work on the last sheet.

I really like the self-reliance aspect of this idea, and will use it again for future lessons. (My paper is Wausau Astrobrights, which I love.)

*** edit 6 April 2014 ***
a link to the worksheets I used

Tuesday, March 25, 2014

Printing 25 March 2014 (and Egg Holder POC)

After another lesson with George Hart at the MfA offices, I was pumped to try out what I learned.  So I took the printer up to after-school tutoring today, to slice and print in the background while I worked with students. I expected my egg holder would take time to calculate in Mathematica (large number of PlotPoints), so while that was running in the background I decided to fill out my collection of Platonic solids. I downloaded a hexahedron (a.k.a. "cube") that's a Hart design which somebody uploaded to thingiverse. Note the link is to a collection of items, of which the cube is a member.

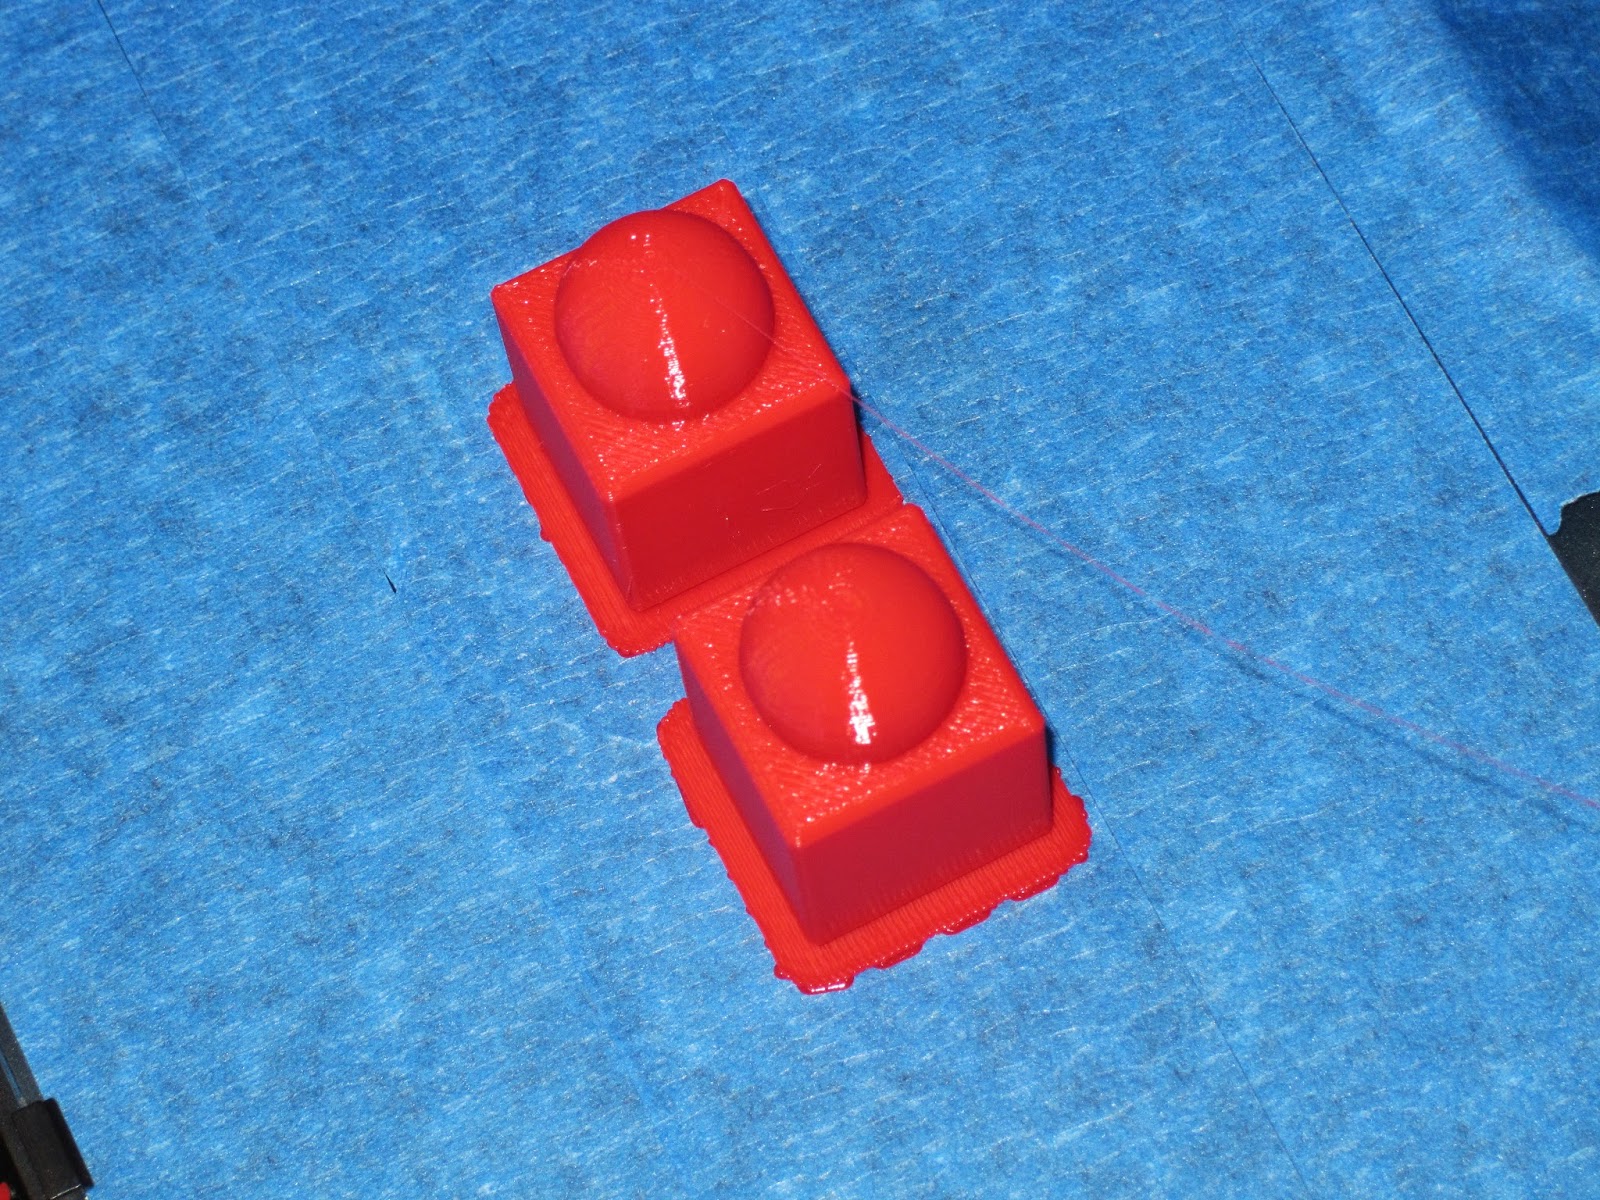
Printing the cube was uneventful until the top cross-edges. I was intrigued to note that the PLA bridged the uprights perfectly in the front-back direction, but drooped in the left-right direction. At first I was dismayed, but then I realized it looked interesting, and let the job continue. After a few layers the software shifted direction, and laid down enough support that the drooping spaghetti effect stopped. I'm interested that this happened in one direction only, and, since the faces of a cube should be congruent, wonder why it happened.

Although the photos below show the thing on my print platform, it's after I've lifted it from the plate, and rotated to try to get a good photo. (Canon PowerShot SD970 IS in macro focus mode)


Although my egg holder finished plotting earlier, the cube took over 50 minutes to print, so I didn't have a lot of time left for that. Basically, the function was a sum of sine curves in the x and y directions. Function call was
RegionPlot3D[ Abs[z - (Sin[2*x] + Sin[2*y])] < .1, {x, -3*Pi, 3*Pi}, {y, -3*Pi,   3*Pi}, {z, -3, 3}]
There were a lot of holes in my surface, so I had to step up PlotPoints. Each tick up increases the calculation time for the RegionPlot, but at each increase there were still holes. It wasn't until I got to PlotPoints->300 that the surface looked smooth and continuous. But took forever to calculate.


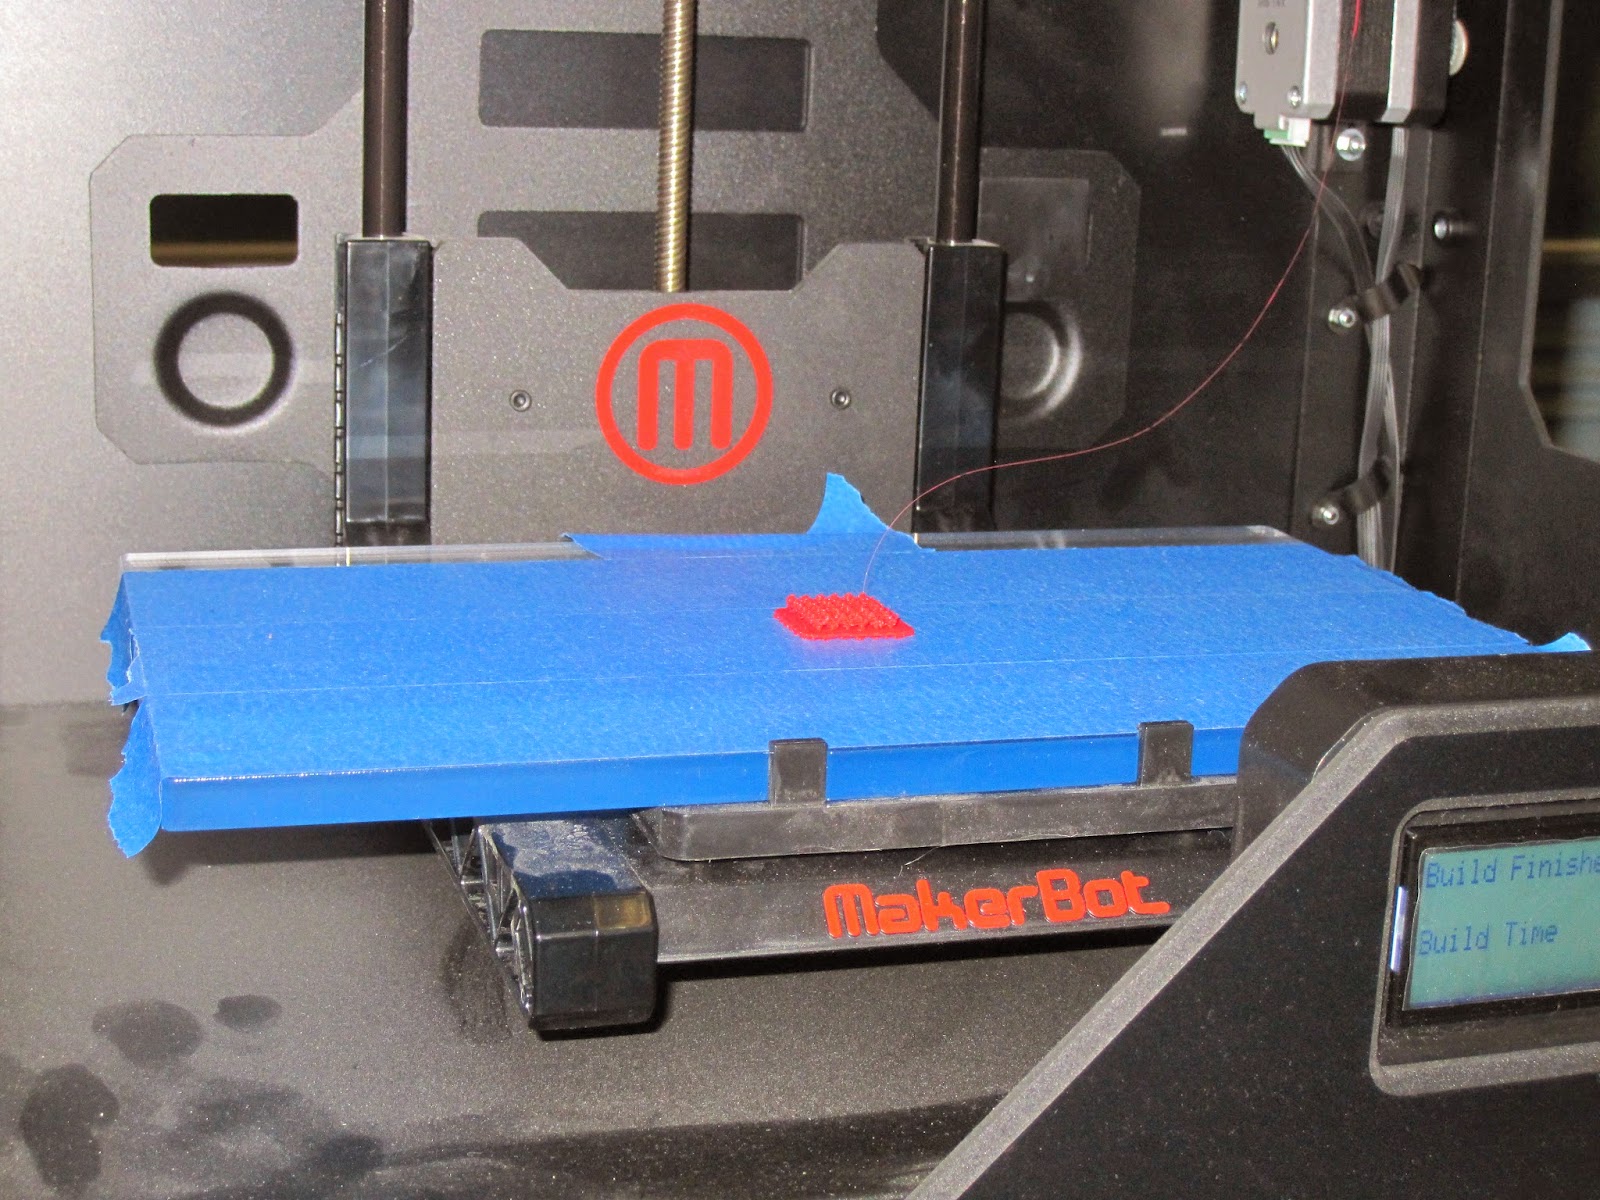
Time was short, so I decided to try printing as the .stl from Mathematica loaded in MakerWare, which is tiny because of the scaling issues with the .stl format. But, as I was warned, doubling the size would roughly octuple the print time, since it would multiply the volume of plastic used eight-fold.

Print was obviously failing from the start. It wasn't sticking to the print platform. So I cancelled the job, and tried again with a raft. This print was successful, even if ridiculously tiny. But it serves as a proof of concept. That is, my sinusoidal egg holder is a viable design. When I have time, I'll try the printout again at double size. Since this tiny one took just over ten minutes, a double size should take under an hour and a half.


Friday, March 21, 2014

3D Printing Friday March 21

This would be much more convenient if I had a secure place to leave my printer. But I have to lock it in a cabinet, and I really only can work with it after school. So today I decided to stay late and try to print.

One issue last time was the thing didn't stick to the print plate. I've found this comes from two causes. To remedy one, I covered the print plate with blue painter tape. This will also help release the finished thing from the print plate, which has been a problem in the past.

I tried printing again, and as the MakerWare software was slicing my thing (the egg holder) I realized another problem. I have edges floating in space. Duh! Of course that won't print well. I need to design a frame around the thing, or else print with supports.

Once the print started, even before it got to the point of hanging objects, I could tell the print wasn't going well. The print still wasn't sticking to the plate. The way it was coming loose, I think, is associated with the plate being out of level. So I canceled the print job in order to level.

As easy as it is in theory to level the plate, it isn't a precise science. The instructions say "raise the plate until you feel just a little friction between the print head and the plate." There's a lot of room for interpretation in that instruction. So I decided to try something that I know I've had success with in the past, and keep trying until it came out good again. That was the five link chain that comes preloaded on the SD card with the printer. After three tries, it printed perfectly.

By this time, it was already 4:30, and I was tired. I wanted at least one nice thing, and didn't want to experiment with my own bad design again. I went to thingiverse and did a search under "hart" to see if I could find any George Hart designs. Sure enough, there are a few available. I selected an open dodecahedron sculpture, downloaded, and sent to the printer. It took almost an hour, but I did end the day with a lovely dodecahedron to show for my efforts (even if it wasn't my own design).

I'll work more on my egg holder this weekend, and, if I have time, try to print during the day Monday.